Proxmox Opnsense Bridged Setup
Table of Contents
Overview
I chose this because I didn’t want to mess with my home network and I wanted to test out opnSense filtering.
Hardware
Software
- Opnsense https://opnsense.org/download/
- Proxmox https://www.proxmox.com/en/downloads
Downloading and Setting up Proxmox
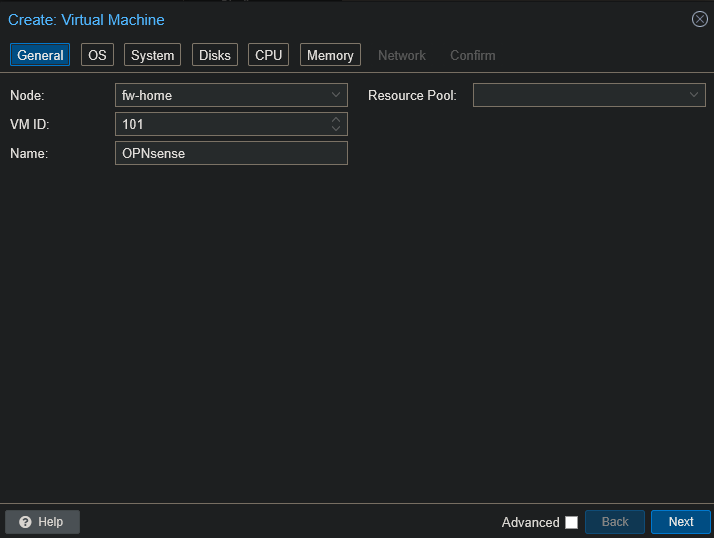
Creating VM
- Make sure you’re not on VPN when trying to connect to Proxmox. Made that mistake before.
- Configs - Default
- General !
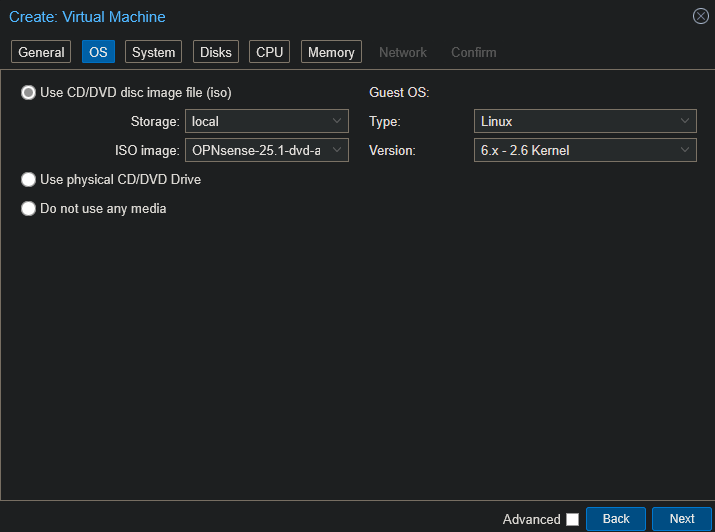
- OS - Choose OPNsense!
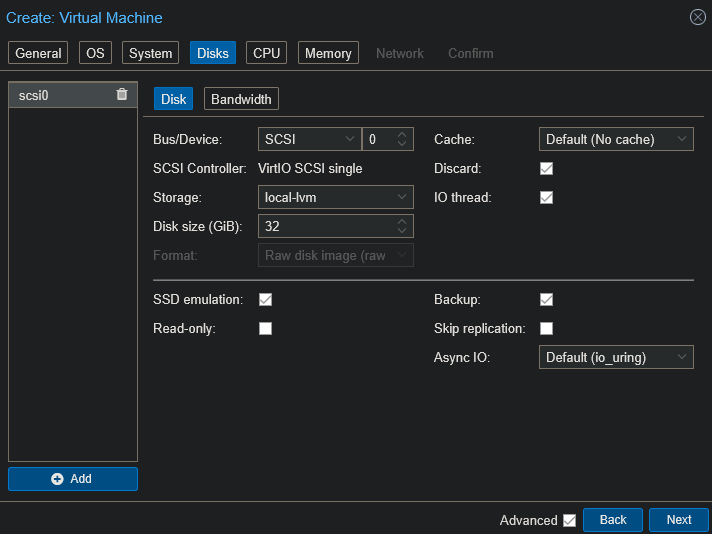
- Disks - SSD emulation!
- CPU - 4 cores, type -
host, gets all features of host CPU!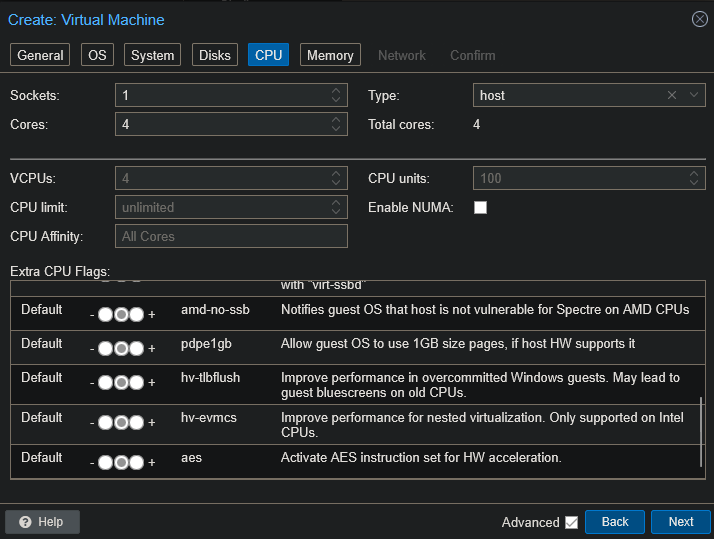
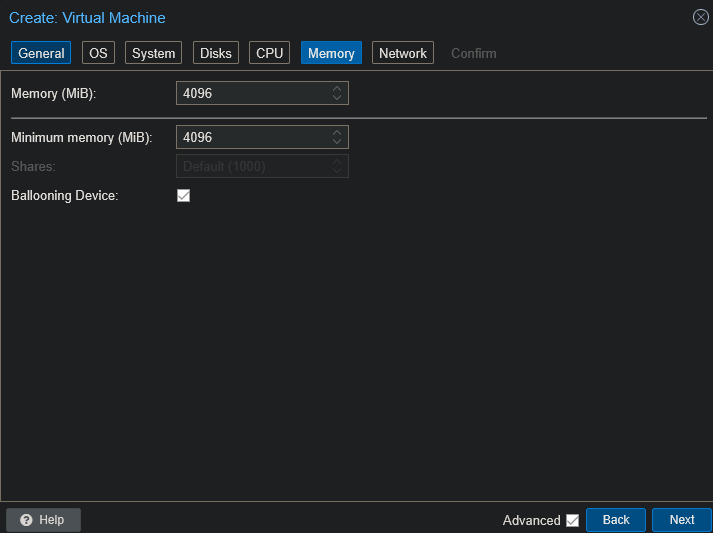
- Memory - 4GB!
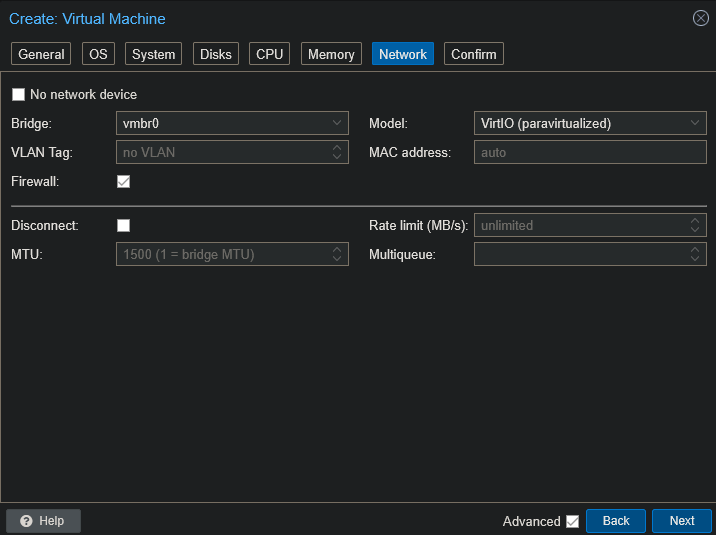
- Network - We will config more later!
- Confirm
- General !
- NIC setup
- Go to
Datacenter> your node >System>network!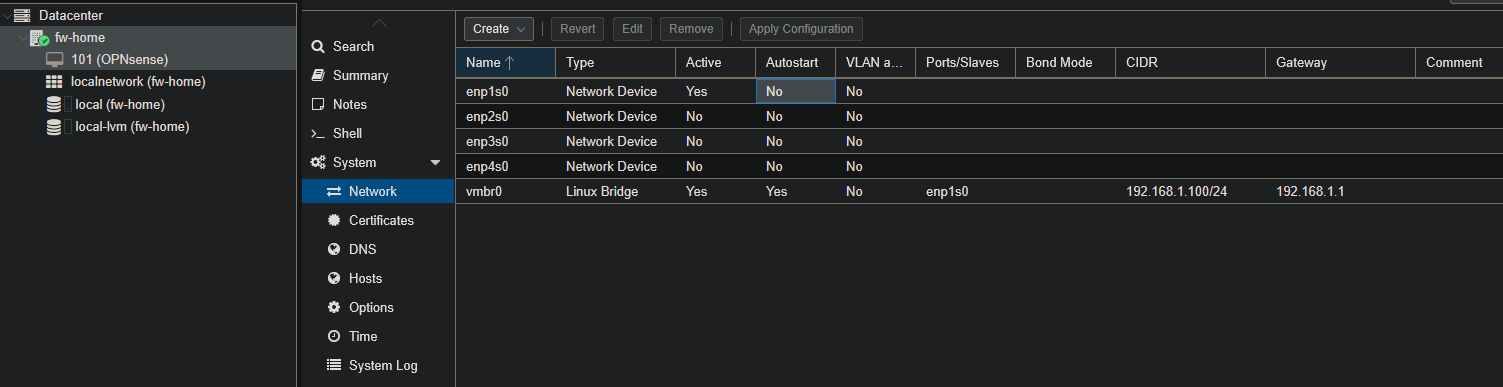
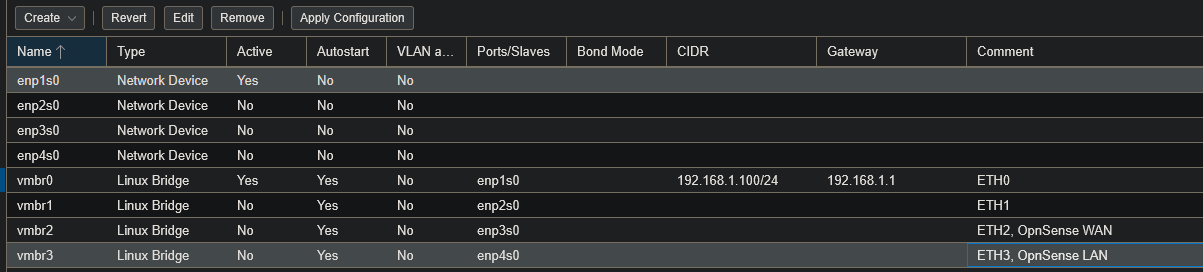
Create>Linux Bridge- Create 1:1 relationship of Linux bridges for each physical NIC you have
- vmro0 was already created so vmbr1 needs to be created.
- I mapped it to enp2s0 and commented the label it has on the physical port!
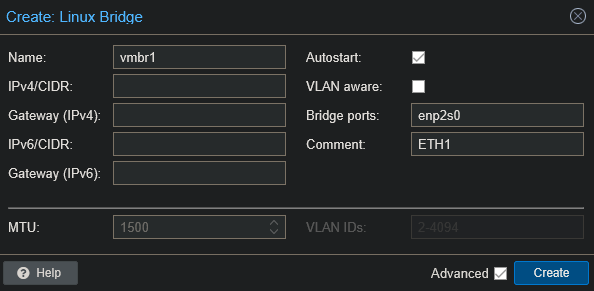
- Repeat!
- Click
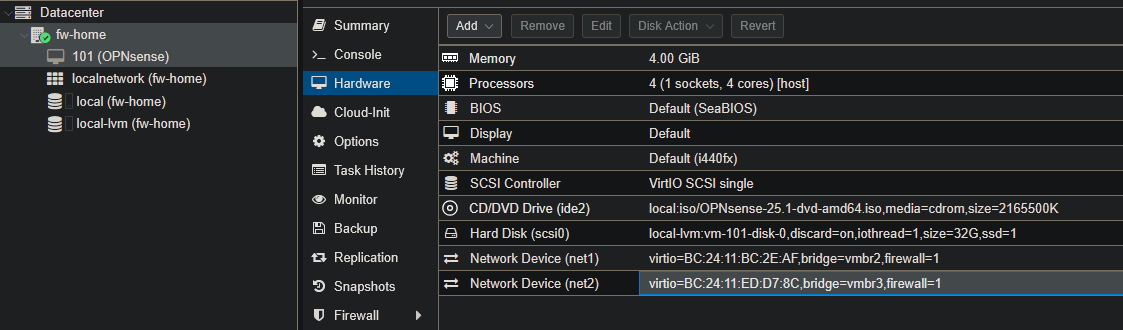
Apply Configurationto save your changes! If you don’t you will get a vmbr doesn’t exist error when trying to start VM![[Pasted image 20250623211526.png]]
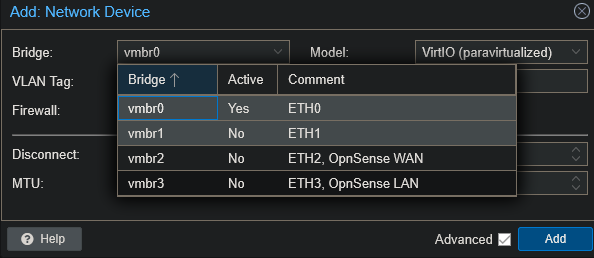
- Go back to our OpnSense VM
Hardware>Add>Network Device- Add your WAN port!
- Make sure that your VM is stopped or else you will get this error 😅!
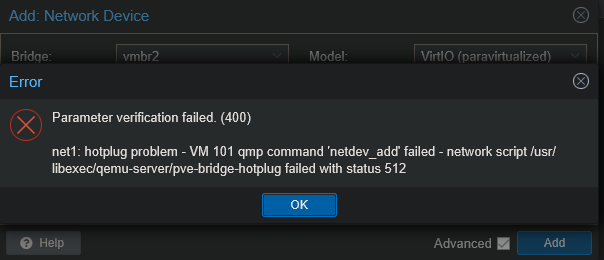
- Make sure that your VM is stopped or else you will get this error 😅!
- Add your LAN port
- Remove vmbr0 because this will be used to communicate to your client / proxmox for config.!
- Go to
OpnSense Installation
- Boot up VM
- It first boots up into Live mode, like linux distros. This is to test. We will need to install to fully utilize opnSense!
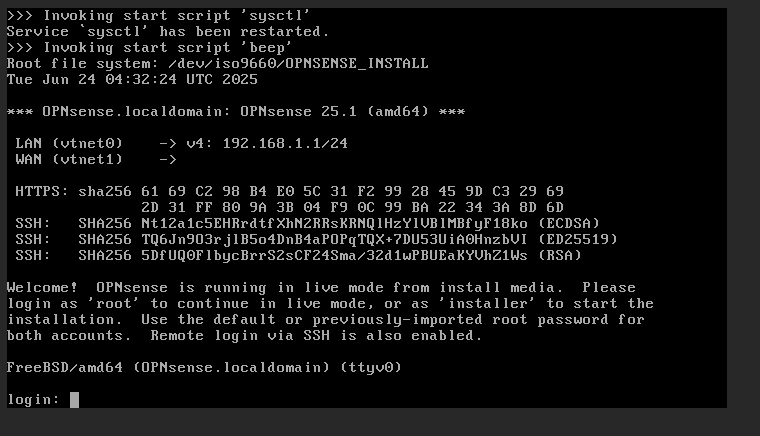
- Login
- User:
installer - Pass:
opnsense
- User:
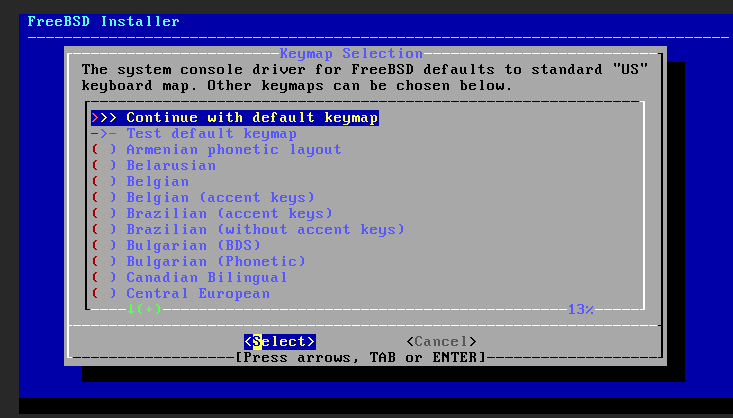
- Installer GUI
- Continue with default keymap!
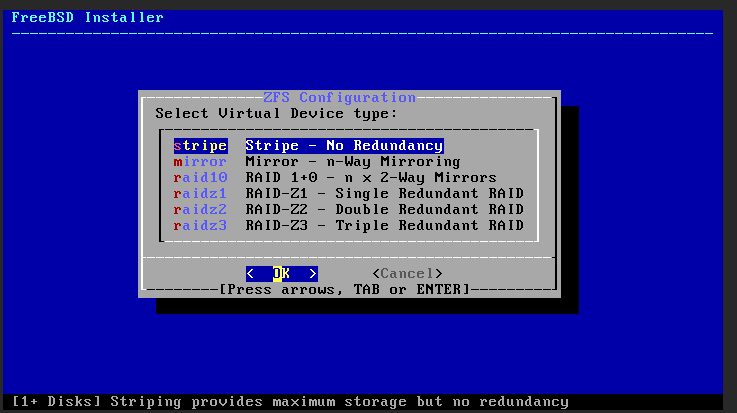
- ZFS or UFS? Per u/jtbis
- Virtual Device type: Whatever your configuration is. I only have 1 drive, so stripe.!
- Select your disk!

- Confirm!
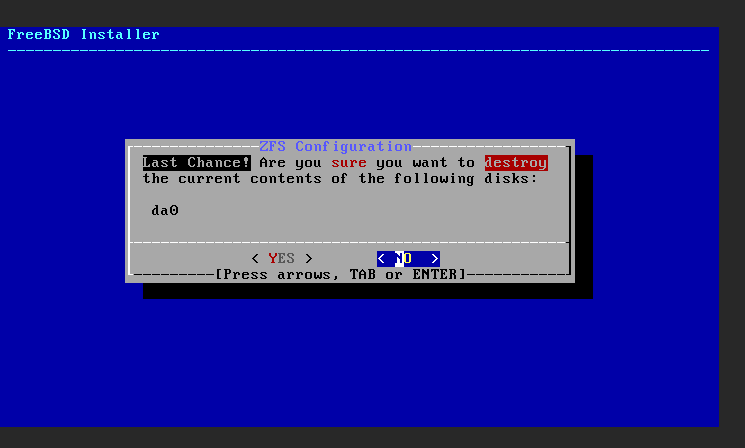
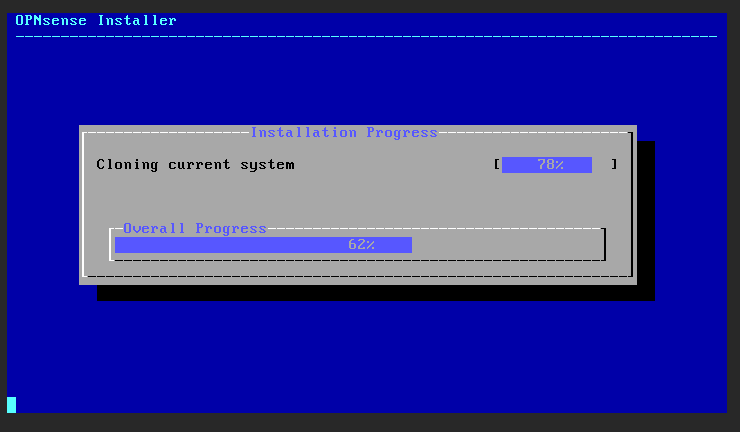
- Wait!
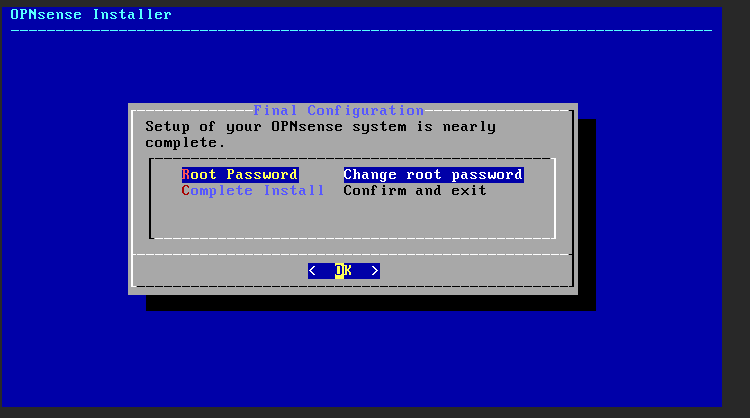
- Change your root password and complete install!
- Reboot now!
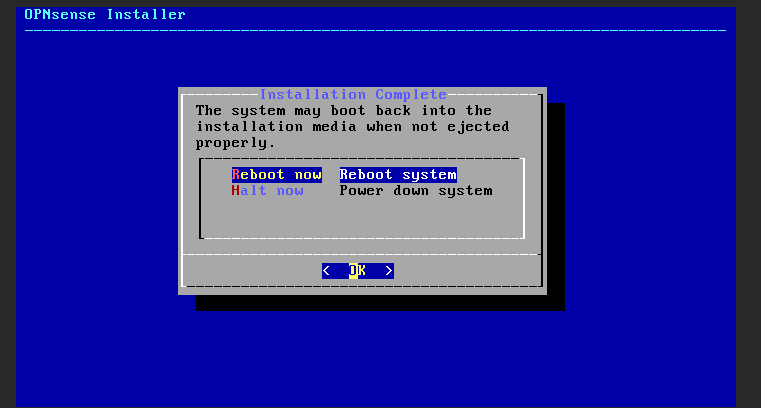
- It will reboot!
- Proceed to the next step
- Continue with default keymap!
Configuration
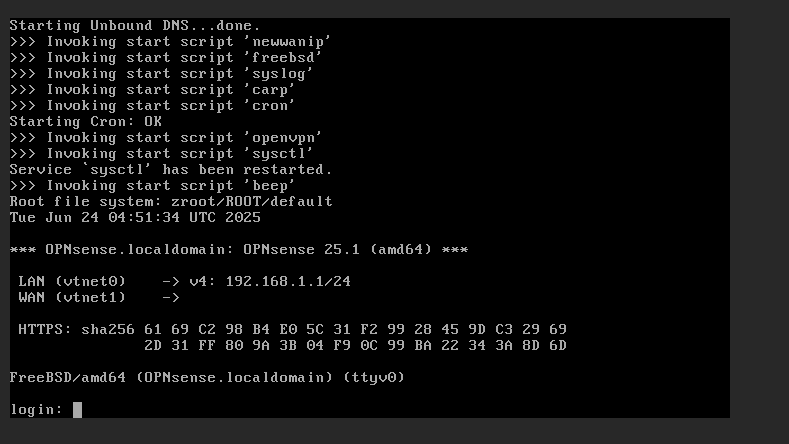
- It will boot back up shortly!
- We will now config the LAN and WAN!
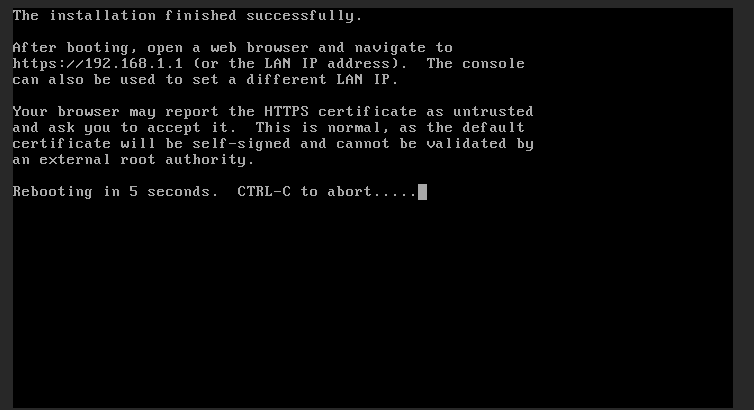
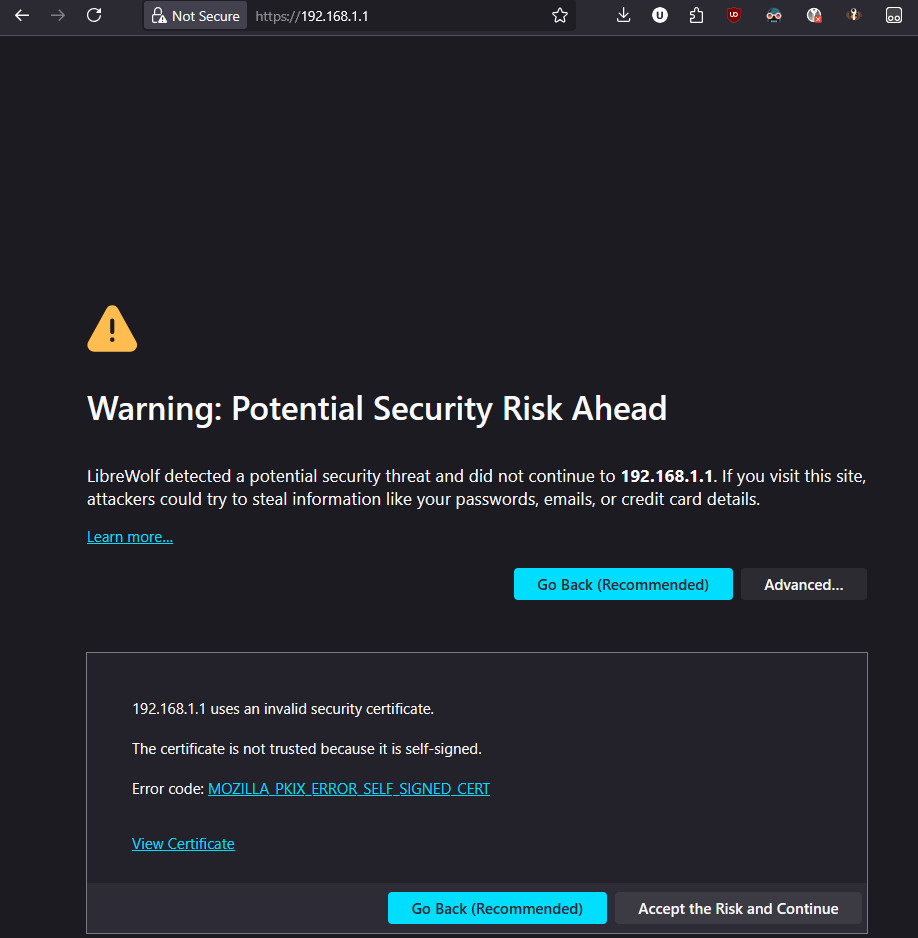
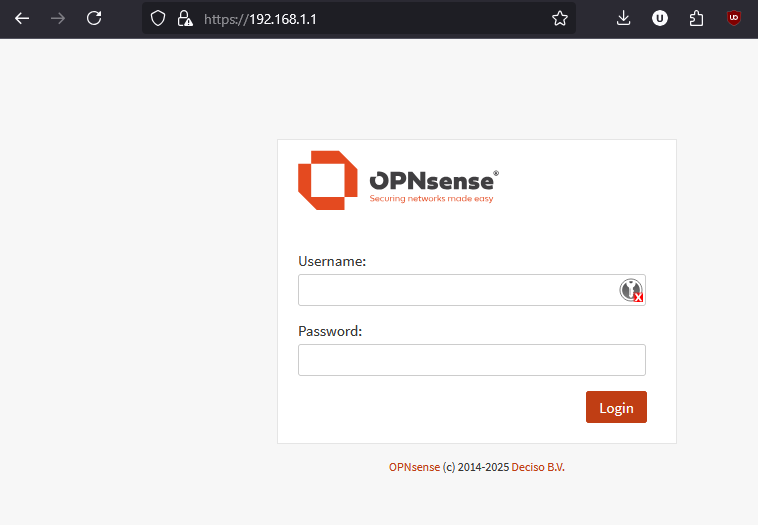
- Plug in your machine into the OpnSense LAN port that you configured and go to 192.168.1.1!
 !
!
- Plug in your machine into the OpnSense LAN port that you configured and go to 192.168.1.1!
- Login to the firewall
- User: root
- Pass: opnsense (or whatever your changed it to)
- Set your DNS Servers. If you have a local one use that.
Enable DNSSEC supportif you would like.!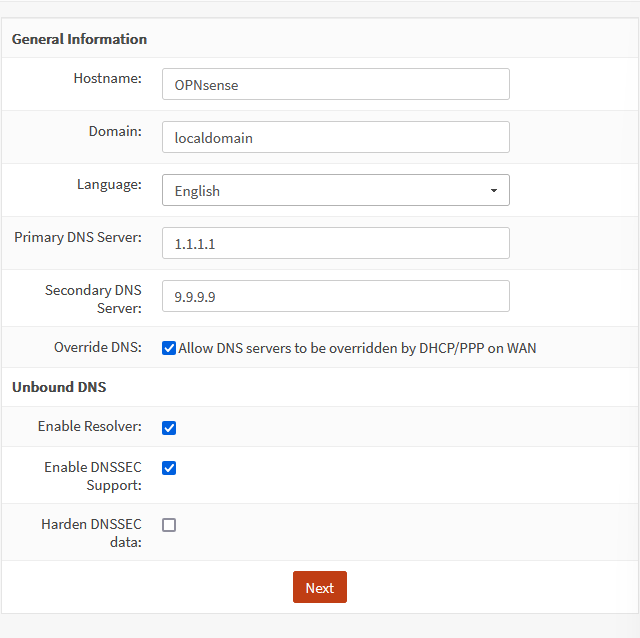
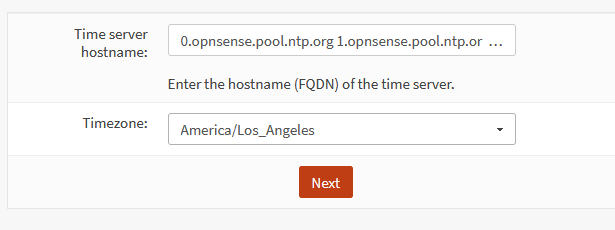
- Choose your timezone!
- We can exit the wizard after this.
Configuring the Transparent Bridge
These steps are taken from zenarmor transparent bridge setup. https://www.zenarmor.com/docs/network-security-tutorials/how-to-configure-transparent-filtering-bridge-on-opnsense
1. NAT: Outbound
- On the left, go to
Firewall>NAT>Outbound> selectDisable outbound NAT rule generation> clicksave> apply changes!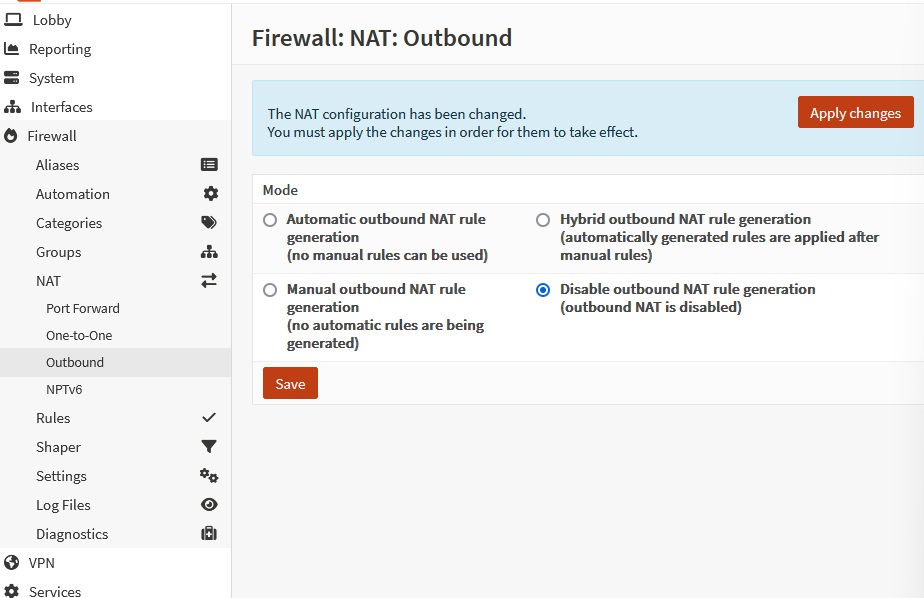
2. Tunables
- Go to
System>Settings>Tunables!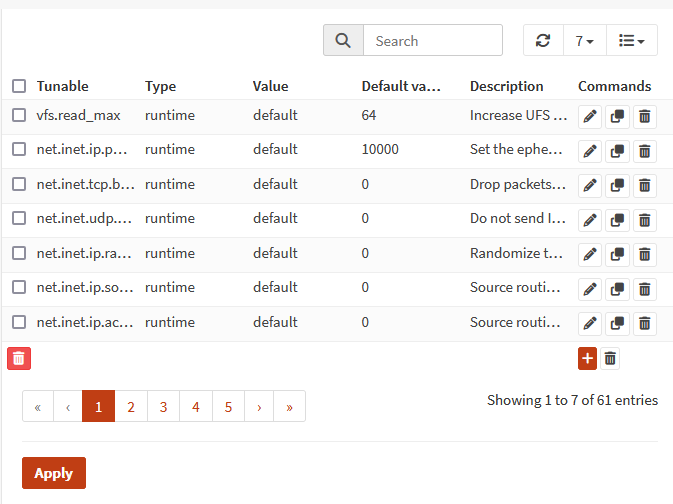 We can use the search bar to filter and pencil to edit.
- We need to edit the following:
net.link.bridge.pfil_bridge: 1!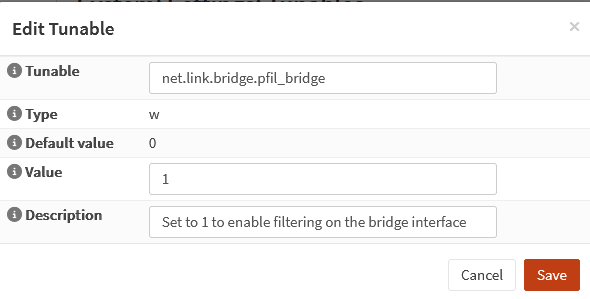
net.link.bridge.pfil_member: 0
- Click
Applyto save our changes
- We need to edit the following:
3. Creating the Bridge
- Go to
Interfaces>Devices>Bridge!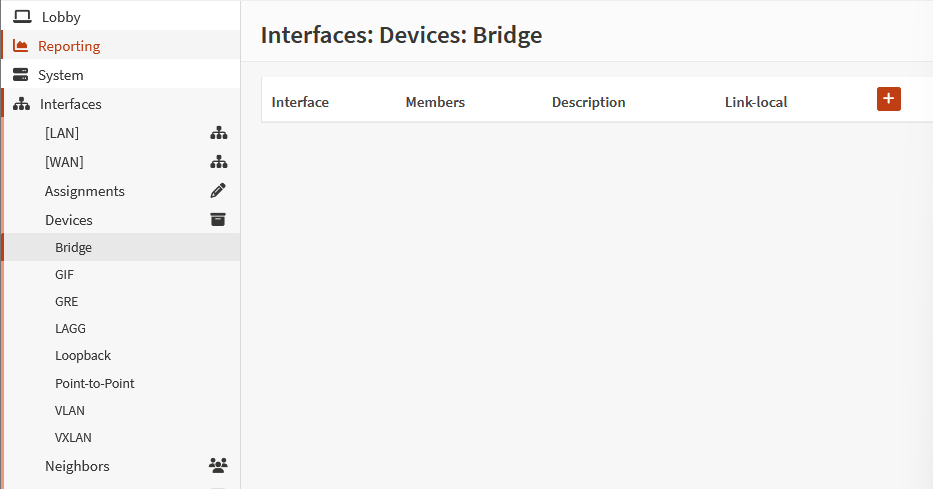
- Click the
+ - For
Member inferacesselectLan, WAN!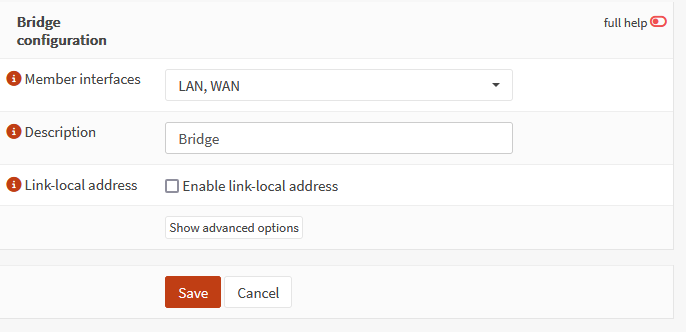
- Click
Save
4. Interface Assignment
- Go to
Interfaces>Assignments - Add a description > click
Add!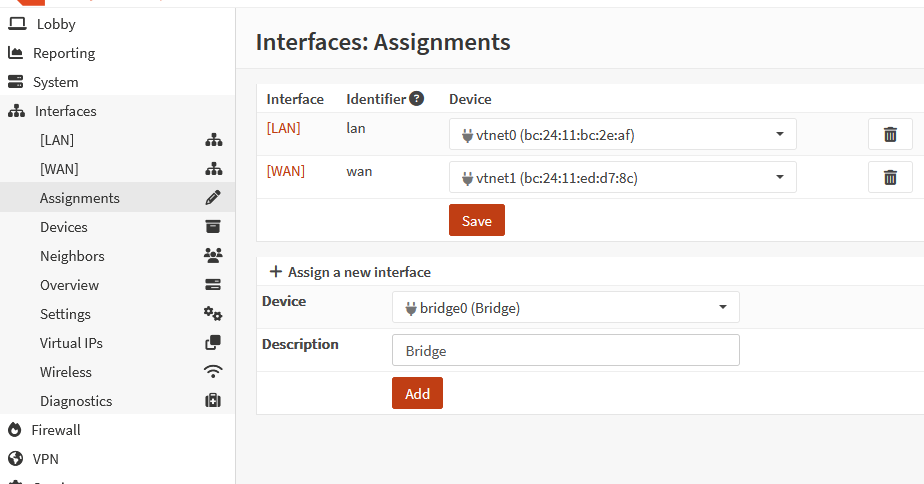 !
!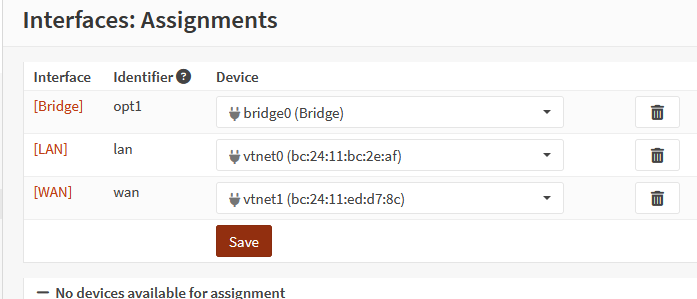
[!note] If you get kicked out of Opnsense, unplug the WAN port for now.
- Click on
[Bridge]- ✅
Enable Interface!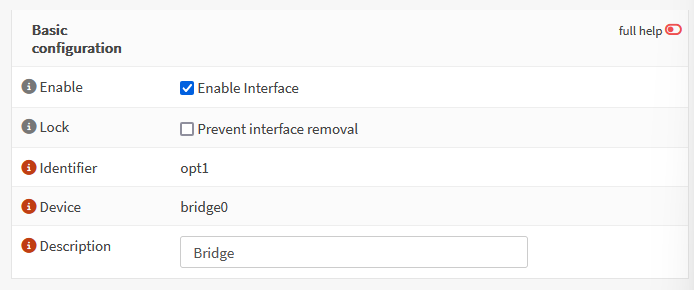
IPv4 Configuration Type: Static IPv4 (or DHCP if you prefer that)IPv4 address: set the address!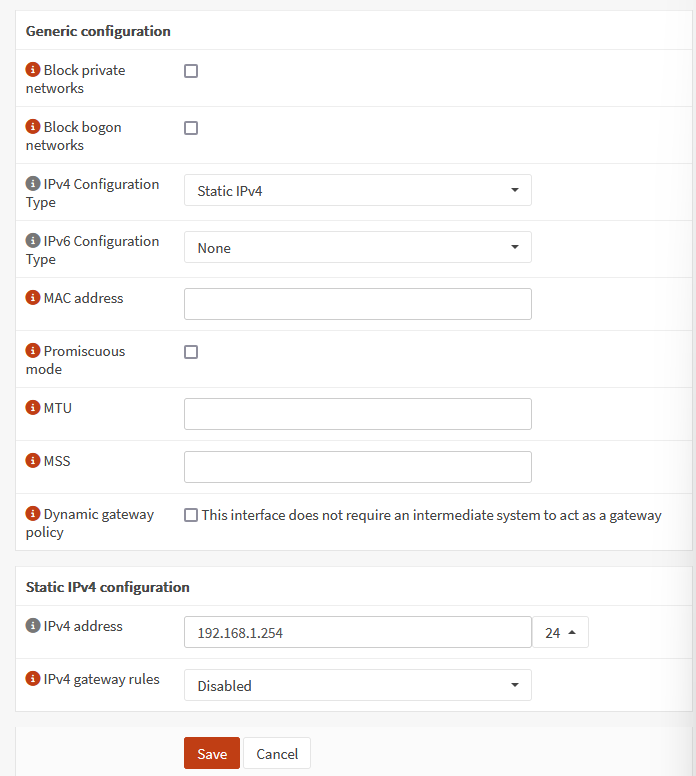
- ✅
5. Disable DHCP on LAN
- Go to
Services>ISC DHCPv4>[LAN]> UncheckEnable DHCP server on LAN interface!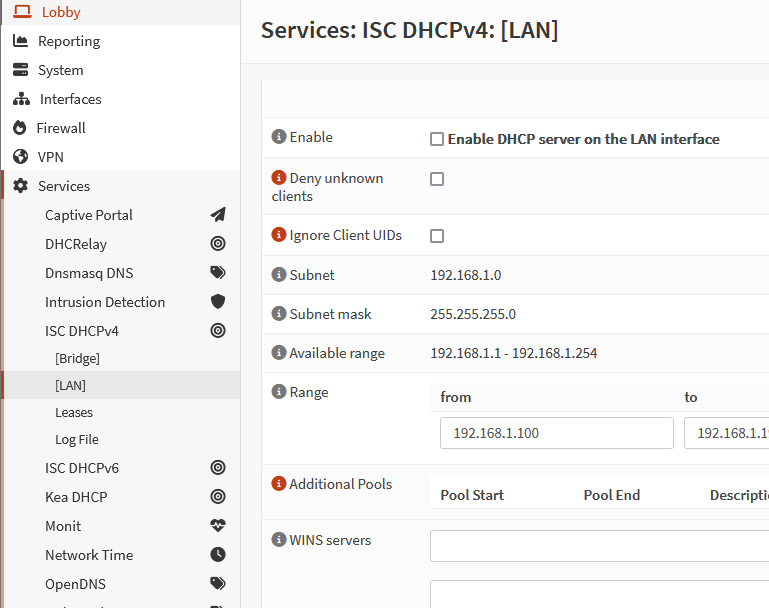
- Click
Save
6. Firewall Rule to Allow All Traffic
- Go to
Firewall>Rules>Bridge - Click on
+to add (Most of these should be default)- Action:
Pass - Direction:
In - Protocol:
any - Source:
any - Destination:
any!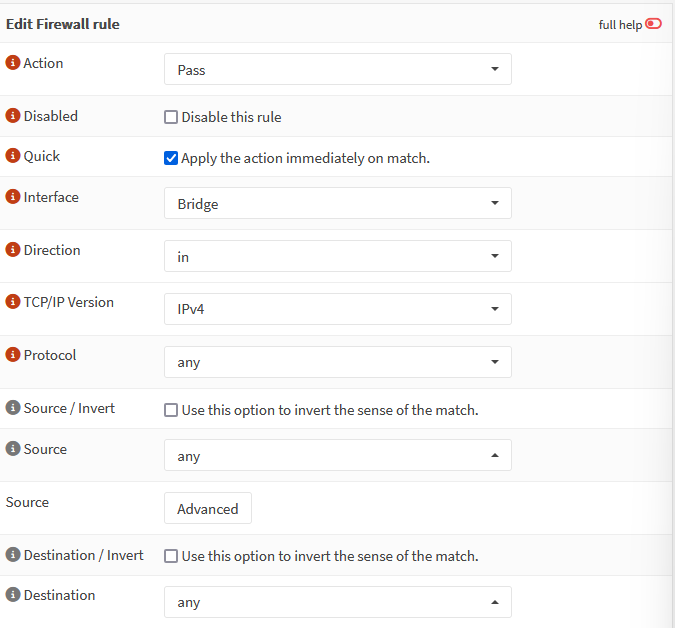
- Log: ✅Check
Log packets that are handled by this rule - Description: Allow All!
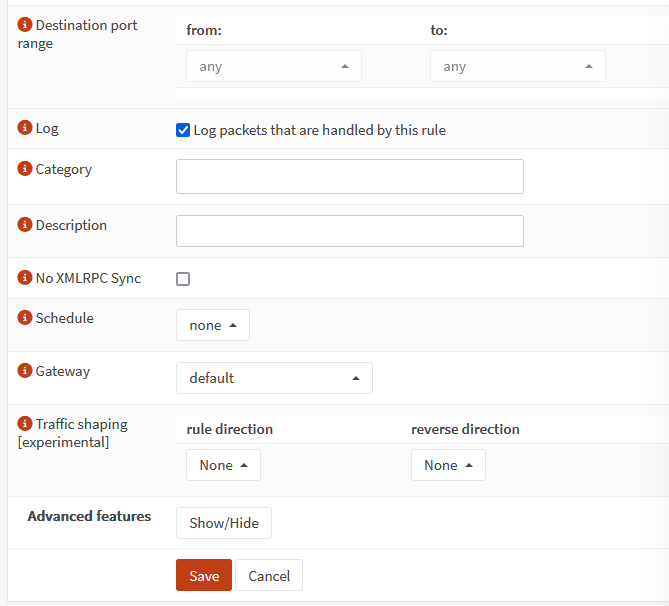
- Click
Save - Click
Apply changes!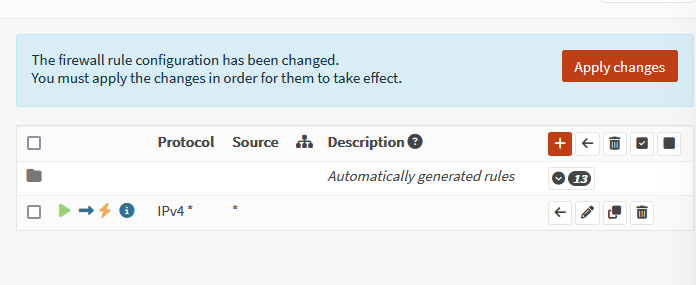
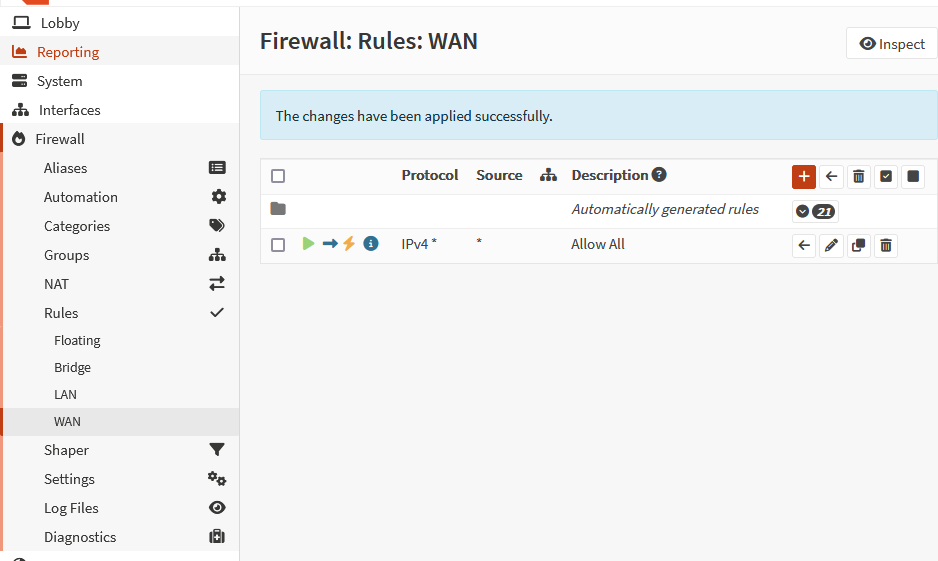
- Do the same for LAN and WAN!
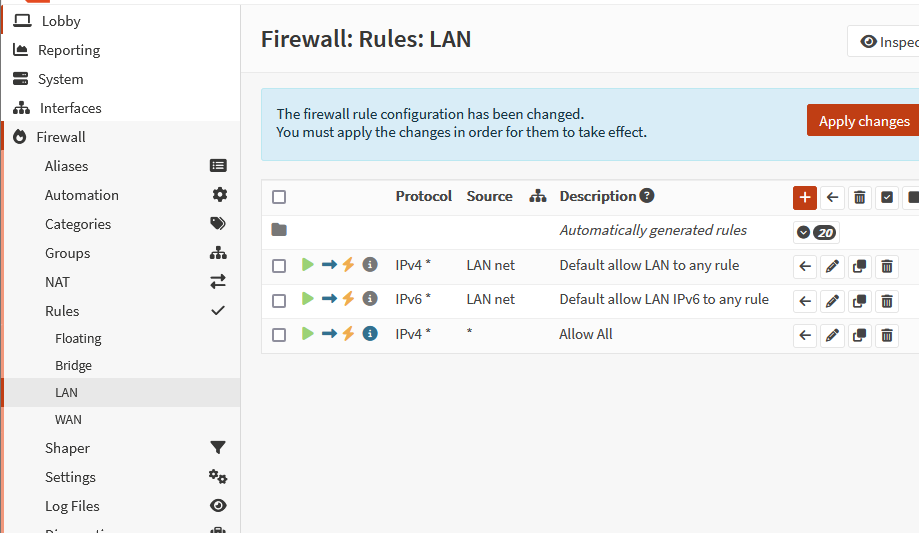 !
!
- Action:
7. Disable Default Anti Lockout Rule
Firewall>Settings>Advanced> UncheckDisable anti-lockout!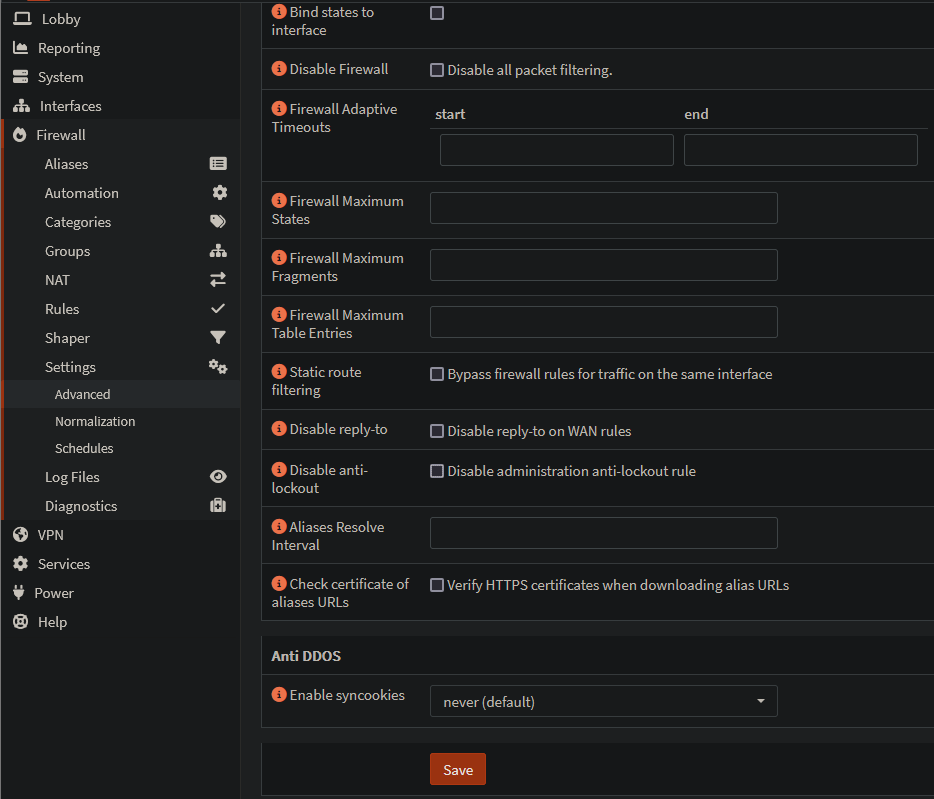
- Click
Save
8. Set LAN and WAN Interface IPv4 Configs to None
- Go to
Interfaces>[LAN] - IPv4 Configuration Type:
None - Click
Save!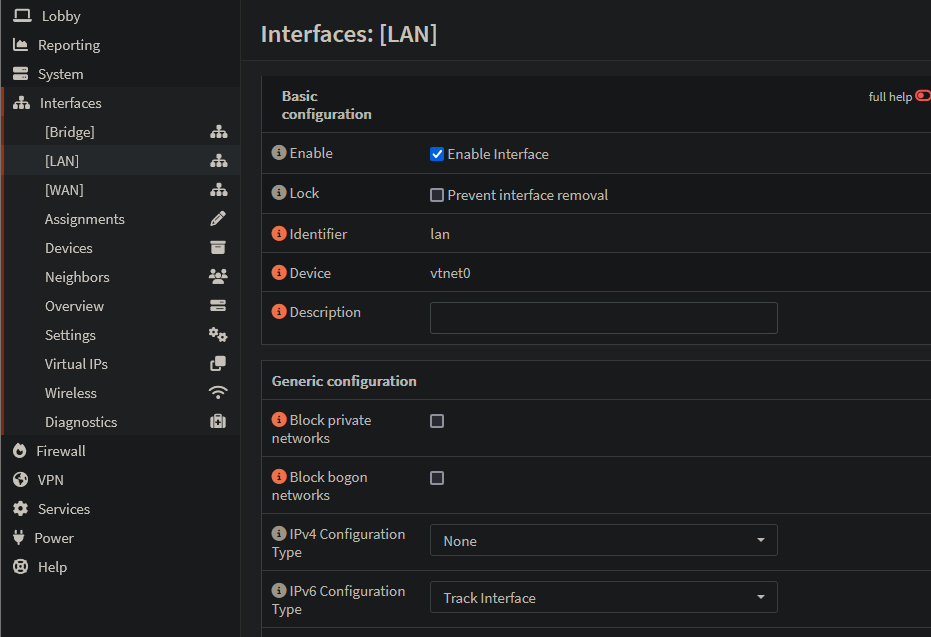
- Do the same for WAN
Conclusion
We should be good now. Don’t forget to plug your WAN / LAN ports into your firewall!